Table Of Content
And you’ll notice that once I’ve selected my text box, there’s this whole sub menu of things here. We’re not going to go into all of those tonight. Just know that there’s lots of things that you can do and I have many tutorials explaining them if you want to know, but for now I wanna center it. So I’m gonna go to Alignment and choose center and now our text is centered. Awesome, so now we need to change this font to a writing font.
App Privacy
If we welded them right now, what will happen is they become one image and they will change to be the same color. So now they’re both purple, and they’re one image. They’re glued together permanently. The only way to undo a weld is to like immediately undo it. Well, there are some other ways actually, but not the way that you just did it.
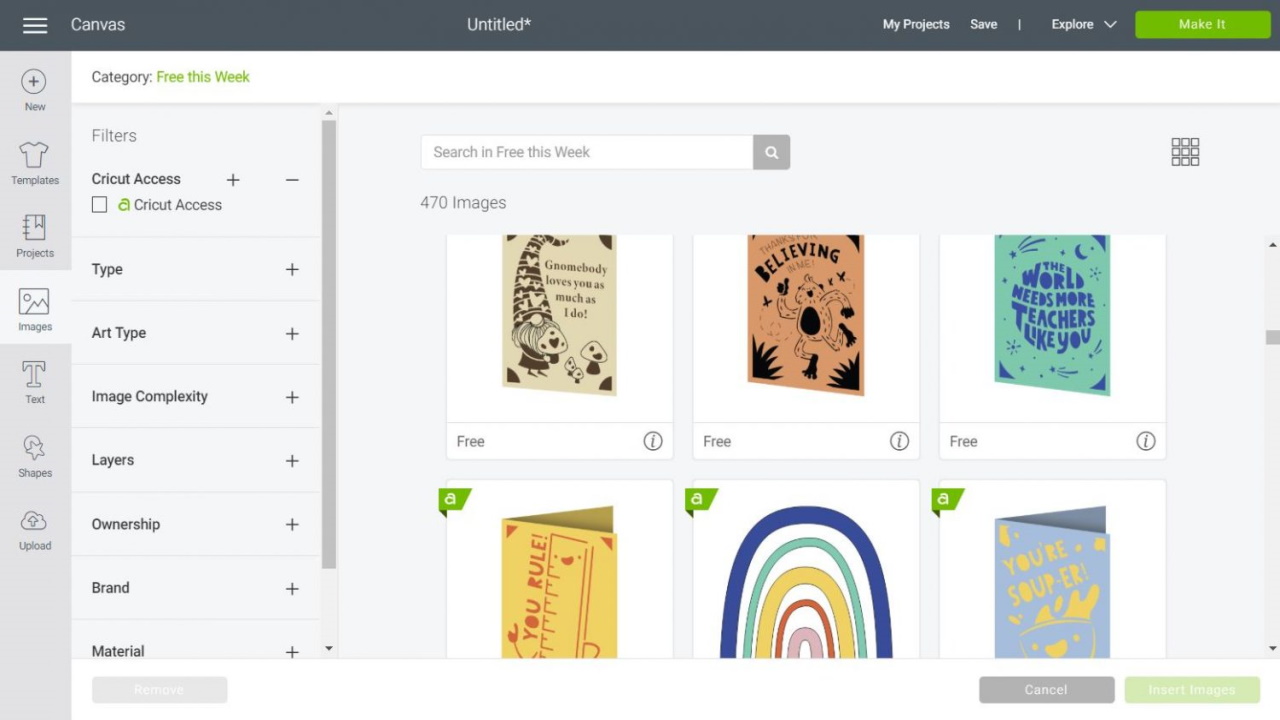
Get a tour of Cricut Design Space and learn the basics of how to use it!
So I can cut it, which is the default. And if I do that, I just get an outline, because this is just gonna draw around the outline. We can engrave it, like a piece of acrylic or something like that. We can, and of course, this is if you have the tools, right? With your Maker, you get the fine point blade and the rotary blade and the other ones, as we discussed in lesson two, are available separately. So there’s also deboss, wave, perf, which means perforate, and then foil and the different tips.
Cricut Design Space Basics: Tips to Use & Find Everything!

So I have prepared a file for us to cut together tonight. So it’s on my blog at jennifermaker.com. All right, so another option that we could have done is we can select him again and we can click on attach, right here.
You can choose where you want it to go by clicking the browse button. And so it’s a good idea to pay attention to where it’s going so you don’t lose it. And then you go ahead and extract it, and it will look like this once it’s opened up. That Mac OSX folder you can ignore.
Workshop: Paper Flowers
So this is text and we are going to have our pen draw, write, this text onto our certificate, along with my signature there. So there’s a few issues right away, as you can tell. That’s not gonna fit on our certificate. Also, I don’t think the pen is gonna write that. We need, and also it’s like, not even like centered or anything. It doesn’t look like a certificate to me, so we need to do a few things here.
Learning Library
All right, I’m gonna click on this deer. All right, so if we, and you’ll notice that if you like make a change and go back up to here, you get another option. So you have save, and if you click save again, it’ll save on top of the one you have. Now, again, this one will be a little harder to get off the mat because it’s more detailed, but we do it the same way.
Make it: Paper Flowers
15 Single-Line Writing Fonts for Cricut Design Space (and Where to Find Them) - MUO - MakeUseOf
15 Single-Line Writing Fonts for Cricut Design Space (and Where to Find Them).
Posted: Fri, 16 Jun 2023 07:00:00 GMT [source]
To view all of your saved projects, click the “View All” link at the far right side of the screen. You can upload your own JPG, PNG, GIF, and BMP images to Cricut Design Space, and even remove the background easily. This is a great way to get nearly any shape for cutting you need! Just find an image online that works for you, upload it, and use the cleanup tools to remove the background. This tip works on the desktop and app versions (both iOS and Android).
How to: Layer Iron-on (HTV)
I’m gonna select that and it’s gonna change, so it actually changes quite a bit. So this here is, and those Gs are just the way they are, it’s just the style of the font, it’s not a mistake. So this is still a little bit too big. Once you change the font, you’ll get changes like that happening, but that looks good. Congratulations to Mr. Maker for completing Cricut Kickoff. Maybe it’s the stars that’s doing it.
And this is another place for us to double check our work before we continue on. So we’re looking to make sure that things are on the mats the way that we think they should be. Do we see our drawing where we expect it to be? Over here, it’ll say, these are the two colors. So we have the blue layer and the yellow layer. And we see our writing on our card is not somewhere else, and it says draw and cut here.
We’re not gonna really go over that tonight, but just know that you can definitely do that. Now don’t go double clicking this file. It’ll just be confusing and it won’t lead you. It won’t like open up magically in Design Space, which would be wonderful, but it doesn’t do that. Instead, we need to go back to Design Space.
Now, the one thing that I didn’t show you, and let’s just go back so I can be complete here, we’re gonna undo and go back until got, our two hearts are separate again. So now we have the ungroup option here, so I’m gonna click that and now they operate independently again. First, you get the Cricut Explore Air 2 Machine you can use to make personalized gifts, home décor, indoor decals, wall signs, drinkware and more.


No comments:
Post a Comment